Wednesday, August 29, 2012

Elderberry Wine Stage 1


We completed the first stage--and likely the most involved--of our first elderberry wine making  adventure the other day. In all, it took four days, quite a bit of guesswork, and what must have been a hundred different checks of the wine's temperature while waiting for it to cool below 90 degrees Fahrenheit (it took about six hours for it to go from about 140 to 90). We also doubled the wine's recipe in order to make two gallons, using nearly 7 lbs of berries.


Here the berries are in the mesh bag, rinsed and ready to be smashed. We salvaged the gallon bucket from the nearby food co-op. This bucket had previously held feta cheese.


Rather ironically, we used a sparkling grape juice bottle to smash the berries. Note the fetching rubber gloves.


Once the berries have been smashed, we added the sugar, orange juice, and grape juice concentrate as the recipe called for.


Then comes the hot water. We put an old towel under the winemaking proceedings to catch any spills. It came in handy.


When you lift out the berry bag, what remains will become wine. Also green goo.


Filling the bottles. These are 1 gallon carboys.


A couple quick observations:

  • DIY stoppers Modeling clay makes for a decent stopper.
  • Mesh bags The small wire mesh bag used for holding the berries during crushing, which I feared would be too small, provided plenty of space to for the 7lbs of berries we used, especially once they were crushed. It could probably handle twice that amount.
  • The heavy lifting Most of the work came in the first day: mixing the ingredients, mashing the berries, squeezing the oranges and lemons, boiling the water, and, as previously mentioned, waiting for the mixture to cool before adding the yeast. 
  • The optimal temperature for adding yeast There was some confusion over when to add the yeast. The recipe says not to add the yeast until the temperature of the mixture has dipped below 90 degrees. However, the directions on the packaging of the yeast say to add it to the mixture when the temperature is between 100-105. Because the packet was enough to make five gallons of wine, we simply added half the packet at the 102 mark and the other half at the 90 mark. Hopefully the extra yeast won't affect the quality.
  • No toes used in the smashing process Smashing the berries with the bottom of a wine bottle as the recipe suggests works well. I was a little concerned that maybe I had gone overboard with the smashing and crushed the seeds, which the recipe warns against, but after emptying the berries from the bag, they appear to be smashed to the right consistency. 
  • That's a lot of sugar! I hate foraging wild food and then blending it with a bunch of processed food, especially sugar.
  • The dreaded green goo As many articles warn about, elderberries emit a green goo, and it is, well, gooey. We tried salvaging our wire mesh bag, which was covered in green goo, by pouring boiling water over it. When that failed we boiled it in water and then boiled it in vinegar water, and then finally gave up and threw it away. We have traces of green goo in our boiling pots as well. Don't mess with the stuff. It will win.
  • Temperature for the fermenting stage Temperature is important, which I didn't learn until after the primary fermentation. Apparently violent swings in temperature is bad for the yeast. The second night the batch was fermenting, the ambient temperature (and inside wasn't far off) dropped to 55 overnight before raising to 80ish during the day. On the third morning, vigorous fermentation, indicated by lots of bubbling action and strange odors, had subsided. Not sure if it was due to the temperature drop. Apparently, 55-65 is best. Keep it in that range.
  • Airlocks Airlocks require water to function properly. We used a three part airlock and a single piece airlock that utilizes two water chambers (pictured). I prefer the latter. It's practically dummy proof. It's the one on the left.
  • Recipe quantity The recipe was supposed to produce just under two gallons. We ended up with about 2.5 gallons.
  • It is fun! Lots of fun! Quinn's parents were in town throughout the process and they really seemed to enjoy it. And it's a project that will last the winter (and remind you of the summer), when foraging opportunities are rather slim. 

Wednesday, August 15, 2012

We're Making Wine!


We've decided to make wine with the 7lbs of elderberries now in our possession. It was mostly Quinn's idea. I wanted to make jam, but she thought it would be too bitter. When I mentioned that my friend's grandfather used to make elderberry wine, she got really excited about the prospect of homemade wine, even though neither of us are big into wine. Quinn says it made her think of the currant wine that was part of a key plot twist in Anne of Green Gables. She thought that homemade wine must be delicious! But that's the power of wild food foraging, it makes foods you typically take for granted much more delicious and appreciated.

Of course, neither of us have ever made wine before. So we did what we normally do when starting a new hobby--we googled it. Specifically, we googled elderberry wine recipe. I eventually landed on this article and decided to go with their recipe, which they call "basic." A good place to start when you're just beginning. 

Typically, the more involved the procedure for harvesting and processing something--the more I enjoy it. This recipe calls for about an eight-month process so it definitely fits the bill. Plus, we might move out of the region in about a year and a half and a couple of bottles of home-brewed wine will make a great memento. It will also make a great Christmas gift.

Although the recipe itself isn't hard to follow (at least it seems that way), I had trouble with some of the lingo. Here's a rough breakdown of that lingo:

Primary:  Essentially, it's a bucket or some sort of container that you mix the berries and              ingredients in. It is called a primary because it is where the initial mixing is done before transferring it to a carboy.

Carboy:  A glass jug. They come in 1, 3, and 5 gallon sizes. You want to match the size of your carboy to the quantity of wine you are producing. Otherwise, you will be doing a lot of topping up.

Topping Up:  Apparently exposing wine to air for an extended period is bad. So you "top up" your carboy until the wine fills the entire thing. This can be done by simply adding water, another wine, vodka, or sterilized glass marbles. But it's best to add as little as possible. Hence the need to match carboy size with expected wine quantity. You'll likely have to top up every time you rack.

Rack:  This is simply transferring wine from one carboy to another empty carboy. It's done about 3-5 times throughout the six or so months. Its purpose is to remove the wine from the sediment that has settled to the bottom. You keep racking and topping up until no sediment remains.

Here's some additional supplies, all of which can be found online or at your local brewing store:

Siphon hose

- Funnel w/ filter. For transferring wine from container to container.

- Airlocks: Google it. They have something to do with keeping air from touching the wine. If you get the plastic ones, they're relatively cheap.

- Stoppers:  They plug the hole at the top of the carboys. If using an airlock, you will need a stopper with a hole through its middle. 

- Bottles: Nothing wrong with use old wine bottles.

- Corks:  Surprisingly expensive.

- Straining Bag:  For putting the berries in to soak in the primary. We bought a small bag, but probably should have gotten a large one. 

- Corker:  For affixing the cork in the bottle. They can be ridiculously expensive or rather cheap. At this point, we haven't bought one yet. But when we do, it will be the cheap variety.

All in all, we spent about sixty dollars on supplies (although we got the primary from a local grocery store), including ingredients to make the first batch. That about gave Quinn a heart attack, but very few hobbies offer an inexpensive start-up fee and this hobby is no exception . Hopefully, we get good use of our equipment over the years and recoup our investment (below is the plant I found the other day that could easily make that wish a reality. It has enough berries to feed a small army). To put that cost into perspective, though, a hunting and fishing license in New York State costs up to $96 dollars. And that price doesn't include all the necessary gear. 


Thursday, August 9, 2012

Texas Hollow Elderberries


As previously mentioned, a friend and I headed to Texas Hollow State Park the other day for some foraging, general exploration, camping, and birthday celebration (he turned 40!). My hopes were that the place would be loaded with blueberries, as the swampy but sunny habitat seemed nearly perfect for it. But like many forays that begin with internet scouting, my hopes far outweighed reality. Although there was plenty of boggy water, there were no blueberries.

However, it is an amazing place, with mature hemlock stands that are reminiscent of the Pacific Northwest, large oak trees, beautiful lakes (some made by beavers), and peace and quiet to boot. It definitely doesn't receive the attention it deserves from the locals, but that just makes it all the more special for those who take the time to explore it. We also found enough deer sign to warrant a return scouting trip sometime in the fall.

We did find one elderberry bush (Sambucus canadensis). Since this is my first experiment with elderberry and I only wanted a little bit of the fruit to determine if it's worth collecting in earnest, the one bush was enough to satisfy my foraging appetite. In fact, that one small bush yielded about 1.5 pounds of elderberries and only took a total of ten minutes to collect!


As always, be sure you can properly identify the plant. There are parts of the elderberry that cause some ill effects if consumed, and some varieties are said to be poisonous.  In my region, the only poisonous look-a-like, according to the guidebook I use, is the red-fruited elder (Sambucus pubens). The two plants occupy slightly different habitats and there's enough variation between the two that I feel pretty confident my pickings came from S. canadensis


The variety I picked prefers rich, moist soil on the margin of woodlands, fencerows, right-of-ways, and abandoned fields. We found our plant right in an open field about ten yards from the lake. Because there were so many fruiting berries on stem, it was rather difficult to pick the fruit singly. Instead, I cut the entire cluster off, placed it in my bucket, and plucked the fruit from the branch when I got home. 

Although my friend enjoyed eating them straight from the plant, most people, including myself, find the taste a little too tart and the texture a little too seedy. So processing the berries into jam or a tart or something else is generally a must. 

The fruits are ripe when they are black. I picked some that were still a little purple and I'm eager to find out if it affects the taste. 


In my research, many sources noted the difficulty of stripping the fruit from the brackets. It took me about twenty minutes to strip 1.5 pounds of fruit from the brackets. I simply held the bracket in one hand and ran it through the other, stripping the majority of fruit in one swipe and then picking the rest off with my fingers. It doesn't get much easier than that. In fact, if you're not willing to put that much time into it, wild food gathering is probably not your thing. You'll hard pressed to find wild food that requires less prep time. 


I haven't made anything from them yet, but I'm eyeing a pie recipe, jelly, and/or elderberry sauce. It appears some of the recipes calls for a food mill, which I don't have, but may soon. 

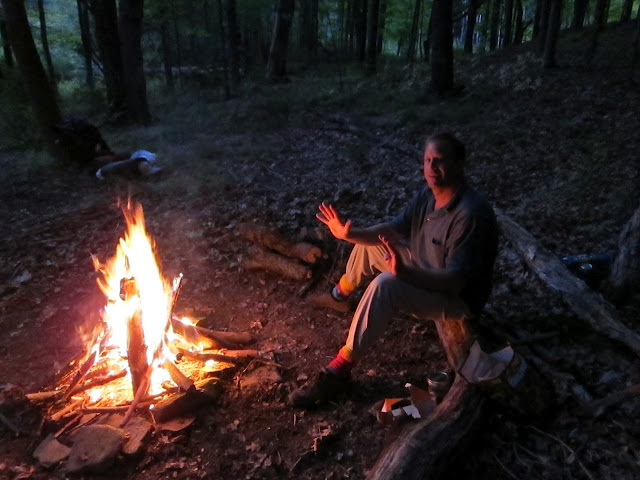
Happy Big B-Day to Brett, who brought in his fortieth in robust fashion, cursing and slapping at mosquitoes while trying to get a good night's sleep.

Thursday, August 2, 2012

New Buckets


Quinn scored us some new foraging buckets from her work. It's such an inconsequential item, but it has me pretty excited! They're just the right size, well built, and, most importantly, free. Good timing too. Last week my blueberry laden bucket broke, sending about 100 or so blueberries rolling across the floor, which I suppose was better than losing them in the forest. 


The buckets will be in use tomorrow for the Friday forage, when I explore Texas Hollow State Forest for the first time. From the pictures and maps I found on the internet, it appears there is some prime habitat for blueberries. I also hope to find some elderberries. I love exploring new places (its like being a kid all over again), but if the place ends up being unproductive I'll have to hit my honey holes, which will make for a very long day of foraging. But there's really no other way to find new places. Hopefully one day I'll have enough honey holes that I can quite scouting new areas and focus solely on areas I know are productive. But until that day comes, it's all about sore legs and long hikes.

Wednesday, August 1, 2012

First Wineberries


Our new apartment, which we moved into last month and finished unpacking last week, is located right next to a major river in the area. 
It holds some really nice fish, and I am eager to explore it with rod and reel once the fishing picks up in the Fall. 

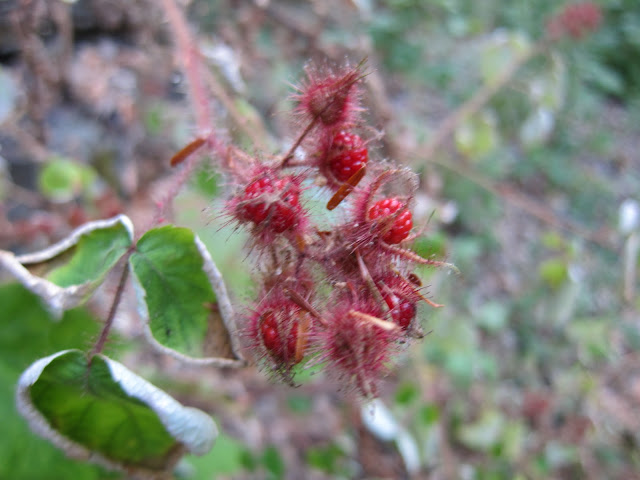
Apparently, it's also loaded with berries. We came across them accidentally on a simple sightseeing visit. Plant ID is not my strong point, and I had never this particular berry before, so I wasn't immediately sure what it was. Its leaves resembled plants in the rubus genus--blackberry and raspberry--but its berries had a weird sticky residue that made my instincts scream poison! So, naturally, I took a little nibble. Tasted like a raspberry, only stickier. Still, my instincts were not happy with the sticky residue.

When I got back to the house, I looked it up in my plant reference book, starting with the Rubus section. I came across a picture of a plant--called a Wineberry--resembling the one I had just discovered. The book noted there are no dangerous look-a-likes, and a couple of the key features it identified--large sticky calx, for example--were enough to convince me I had the right plant. 


My reference book said the plants like disturbed areas, field edges, and river banks. This being a dried river bank and a disturbed area were more clues that I had the right plant.
So, of course, I returned and picked a jarful. We ended up mixing it with some raspberries and making a jam. It is delicious and the seeds in the Wineberry give the jam a nice, wholesome look. For the jam, we cut the recommended sugar in half. We also used our breadmaker, which has a jam-making feature. It was quick, easy, and tasty. 


Mashing the berries with a fork.
The bread/jam machine. Pour it in, turn it on, and come back to some nice jam in about 2 hours.
The finished pint of jam. From about 2 cups of berries.
Also found this odd purple-flowered raspberry. Not really knowing what it was, I googled purple-flowered raspberry and turns out it is the aptly named "purple-flowered raspberry." Not quite as tasty as the standard raspberry.